image to image Stable Diffusion ( Img2img ) is a feature that takes the creativity of Stable Diffusion to a whole new level. In today’s article, we’re going to start from scratch to understand how to use Stable Diffusion’s img2img feature, and how to adjust its parameters to get the best and most customized output.
Table of Contents
ToggleWhat is Image to Image Stable Diffusion ?
Before we start talking about the technical part of things, let’s have a deeper understanding of what this feature really is.
So imagine you have a photo or a simple sketch, but you want to give it an artistic flair or a unique style. It is really hard to do it manually, but with AI features like Img2img, it becomes viable and possible.
To put in simple words, Img2img allows any of your images to retain their original content while adopting a completely different style or artistic effect.
The Img2img feature in Stable Diffusion does an excellent job in:
- Creative inspiration: It can help you explore new artistic directions, turning ordinary photos into stunning artworks.
- Time-saving: Compared to creating from scratch, img2img can help you realize ideas faster.
- Style transfer: It’s easier to apply one artistic style to different images under this mode.
- Restoration and enhancement: It can be used to improve old photos.
- Concept exploration: It is also a great tool to quickly visualize different concepts, especially for designers.
Get to Know Img2img in Stable Diffusion
Now let’s dig a little deeper into how to use img2img stable diffusion. First off, let’s take a look at the main interface of Img2img.
At the top, you’ll find positive and negative prompts, and an area where you can upload images, with the text “Drop Image Here – or – Click to Upload.” Following that, you’ll find the relevant parameters.

Most of these adjustment options are similar to text2img, but there are two new ones: Resize mode and Denoising strength. Now let’s take a closer look at these parameters.
Resize Modes – The output Dimension
Let’s start with Resize mode.
When trying out Stable Diffusion’s Img2Img feature, it’s best to keep the output image size consistent with the uploaded image. However, if you need to generate an image with a different size, choosing the right Resize mode becomes crucial in terms of the output quality.

Here are what all the resize modes mean:
Just resize: This mode adjusts the image to match the width and height set for the output. If the dimensions of the uploaded image differ from those of the output, the image will be distorted. That’s why you should be extra careful when using this mode as it can give the image a very strange look.
Crop and resize: This option crops the image to fit the dimensions set for the output. This is also the most recommended method.
Resize and fill: Images will be resized and cropped under this mode. If the uploaded image’s dimensions differ from the output settings, the extra space will be automatically filled.
Just resize (latent upscale): Images will be simply resized to match the output dimensions and use latent space upscaling.
Denoise Strength – How Much the Image Alters
Now next , let’s talk about one of the most important options in Img2img – Denoise Strength.
In Stable Diffusion, the Denoising Strength parameter controls how much the original image is altered during the Img2Img process. Essentially, it determines the balance between keeping the details of the original image and introducing changes based on the prompt.
- Lower Denoising Strength: Keeps more of the original image’s details, making the output look closer to the initial input.
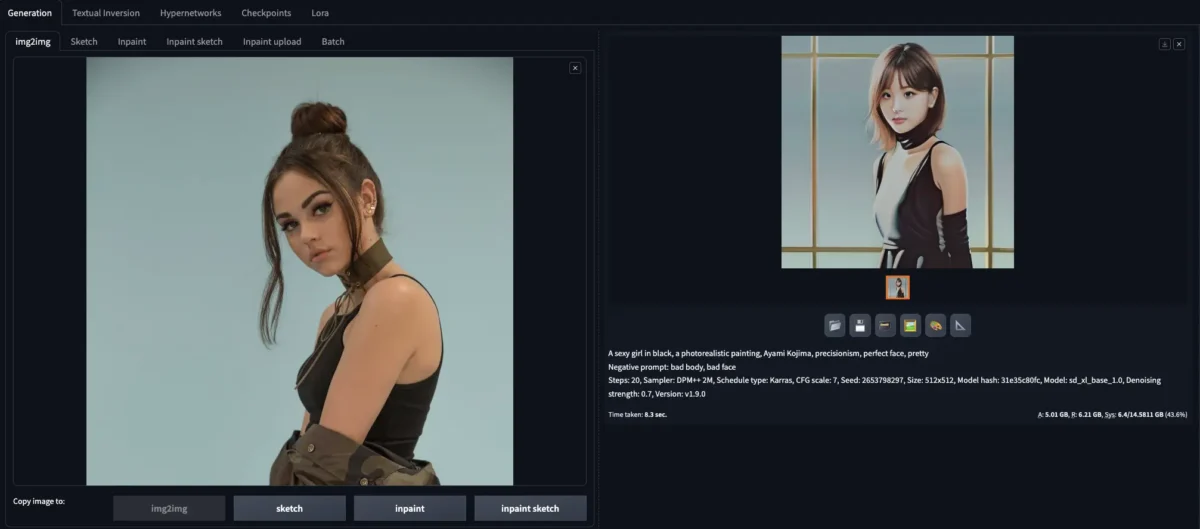
- Higher Denoising Strength: Allows for more significant changes, making the output diverge more from the original image and aligning it more closely with the prompt’s description.

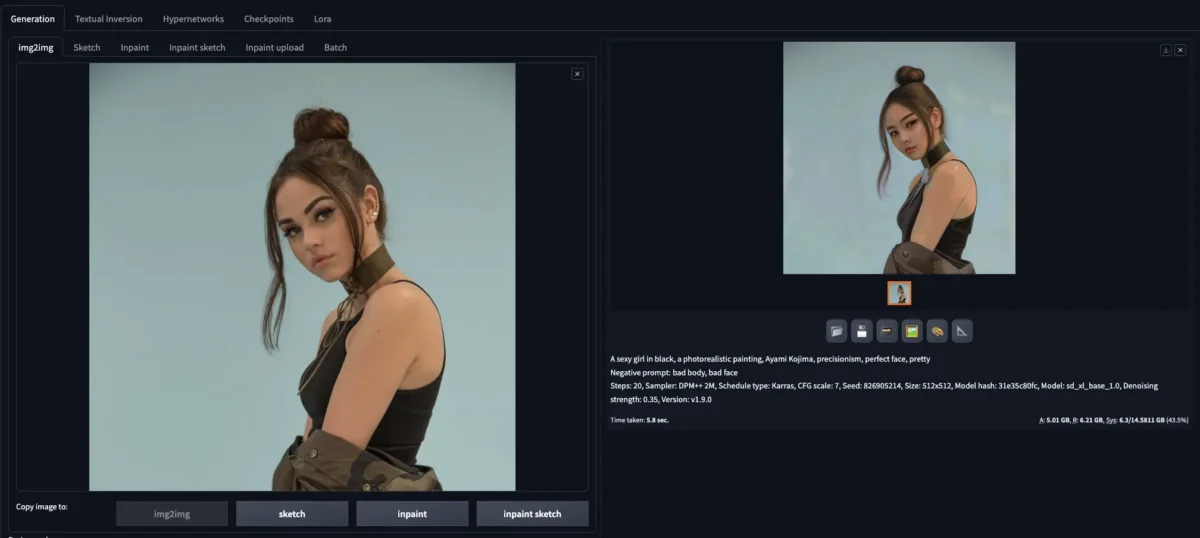
0.25 Denoise Strength
Choosing the right level of denoising strength is important for achieving the desired blend of original content and new style or modifications.
If you need to experiment with different outcomes, setting the parameter to 0.4 is a good starting point. If the final result doesn’t show enough stylistic change, try increasing the value slightly. Conversely, if you encounter strange or unwanted effects, lower the value accordingly.

0.7 Denoise Strength
Additionally, to minimize undesirable results, it’s highly recommended to include terms like “bad fingers” or “bad body” in the negative prompt.
Read also- Best Free Ai Tools to Upscale Ai Artworks
Inpainting – Applying Minor Changes
If you want to modify specific areas of an image while keeping the rest of the image unchanged, inpainting is here to help. This is the most valuable feature in Img2Img mode, in my opinion, because we can use it to create interesting effects like changing faces, clothes, or backgrounds.

For example, if I select the girl’s clothes and provide a new description, I’ll get an image of the girl wearing different clothes, while everything else in the image stays the same.
Performance Considerations for Img2Img
Sure, Stable Diffusion’s Img2Img feature is indeed versatile and easy to use. But there is one problem that you might have, and that would be, the software can sometimes be slow and lagging.
So why would this happen?
The reason is actually pretty simple. When working with complex images or high-resolution outputs, Stable Diffusion requires great system resources in order to process and generate images. In a situation where your hardware, especially the graphics card, is not powerful enough, your computer might suffer from insufficient resources.
Now that we know the reason, the solution becomes clearer. If you find the performance on your local machine to be lacking, or if the system load becomes too high, one of the best solutions is using an online alternative like Mimicpc, instead of upgrading your hardware.
Mimicpc

Cloud-based solutions like Mimicpc usually use cloud computing resources instead of local hardware resources. That’s why they can allow you to use Stable Diffusion’s full capabilities without needing to set up or manage the environment on your own computer.
That is to say, by using these cloud services, you can enjoy faster processing speeds and reduce the strain on your hardware. Then you can focus more on your creative work and less on technical constraints.
Conclusion
So today we talked about everything you need to know about the Img2img feature in Stable Diffusion. Do keep in mind that in order to get a decent output, it’s important to set a proper value to each parameter and experiment with different inputs. If you find any slow-down happening to the system, try upgrading your hardware, especially graphics card, or just use a cloud-based alternative like Mimicpc.


